How to play Dune Jar
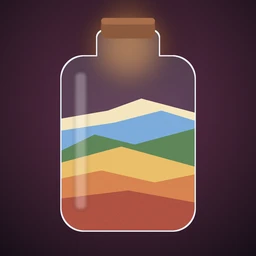
Every jar in Dune Jar hides a sand picture, shown as a faint striped outline inside the glass. You pour coloured sand, layer by layer, until your jar looks like it. Each grain falls, slides and settles like real sand, so the way you pour shapes the picture. The little jars on this page run the same sand simulation as the game.
1. Pour
Hold inside the jar to pour. A marker appears at the mouth of the jar with a guide line down to where the sand will land, so your finger never hides the spot. Keep still for a moment (or keep holding) and the sand starts to flow. Match the faint picture. Drag to move the stream. Let go to stop.
- A quick tap pours nothing, so you can aim for free.
- Drag slowly for fine control: a slow drag moves the stream less than your finger, one column at a time. Drag fast to cross the jar.
- The stream is five grains wide and pours about 360 grains a second. Each bag holds a little more sand than the picture needs.
- Tap a bag to choose the sand colour. Some pictures use the same colour twice, from two bags.
2. Know your sand
One pour in the same spot builds a cone. How steep the cone is depends on the sand in the bag:
Grains that have come to rest stay put until new sand lands next to them, so earlier layers keep their shape while you pour on top. The bag icons show coarse and wet sand; the Daily Jar uses dry and coarse sand on weekdays and adds wet sand at weekends.
3. Layer from the bottom up
The picture is a stack of layers, and the bottom layer has to go in first. Read the picture from the bottom: which colour touches the floor of the jar, which one sits on top of it, and where each layer is highest. The highest point of a layer is where it was poured.
The sand can't be taken back out, so it is safer to pour a bit too little and top up than to pour too much. Watch how thick each layer is in the picture: a thin band needs a short pour.
4. The stick
New: the stick. Tap it, then tap the sand to make a dip. The stick pushes a narrow hole into the sand and the sides slide in, leaving a V. Pour a new colour into the V and you get the sharp dips and spikes that pouring alone can't make. The Daily Jar always has the stick.
Along the five beaches of the app you also pick up three more tools: tap the jar to settle the sand flatter, tilt the jar to slope the next layer, and switch the funnel between narrow and wide.
5. Cork it and score
Looks alike? Cork it! The sand settles and your jar is compared with the picture, colour by colour, in both directions: every grain you poured should sit where the picture has that colour, and every part of the picture should be covered. A grain one cell away from the right spot still earns 80%, two cells away 40%, so you don't need to be perfect.
| Match | Result |
|---|---|
| 95% or more | ★★★ Beautiful! |
| 88% or more | ★★ Lovely |
| 75% or more | ★ Corked |
| Below 75% | Not quite: look at the differences and try again |
As a guide, a layer poured one column off still scores about 96–97%, two columns off about 92–94%. Pouring extra sand doesn't help: sand where the picture has none costs as much as sand that is missing. After corking, the difference map shows missing sand in red and extra sand in blue.
Each finished jar can also earn three gems: Sand to spare (10% or more left in the bags), No tools and No undo. In the app, gems buy jar shapes, tinted glass and sparkling sand in the Glass Shop.
Tips for three stars
- Hold to view. Press and hold the button to see the picture clearly, then pour while it is faint so you can see your own sand.
- Aim before you pour. Line the guide up with the highest point of the layer in the picture before the sand starts.
- Pour in short bursts. Let the sand settle, check the Match meter, then pour a little more. The meter updates when the sand stops moving.
- Undo freely. Undo takes back the last pour or stick and returns the sand to its bag. It costs only the No undo gem.
- Mind the sides. Sand slides off a peak in both directions. To fill a corner, pour close to the wall rather than in the middle.
- Use the stick early. Carve the dip before the next colour goes in; a dip under three layers of sand is hard to reach.
Ready? Everyone pours the same jar today, here in the browser and in the app.